Broadcast - 26 April 2026
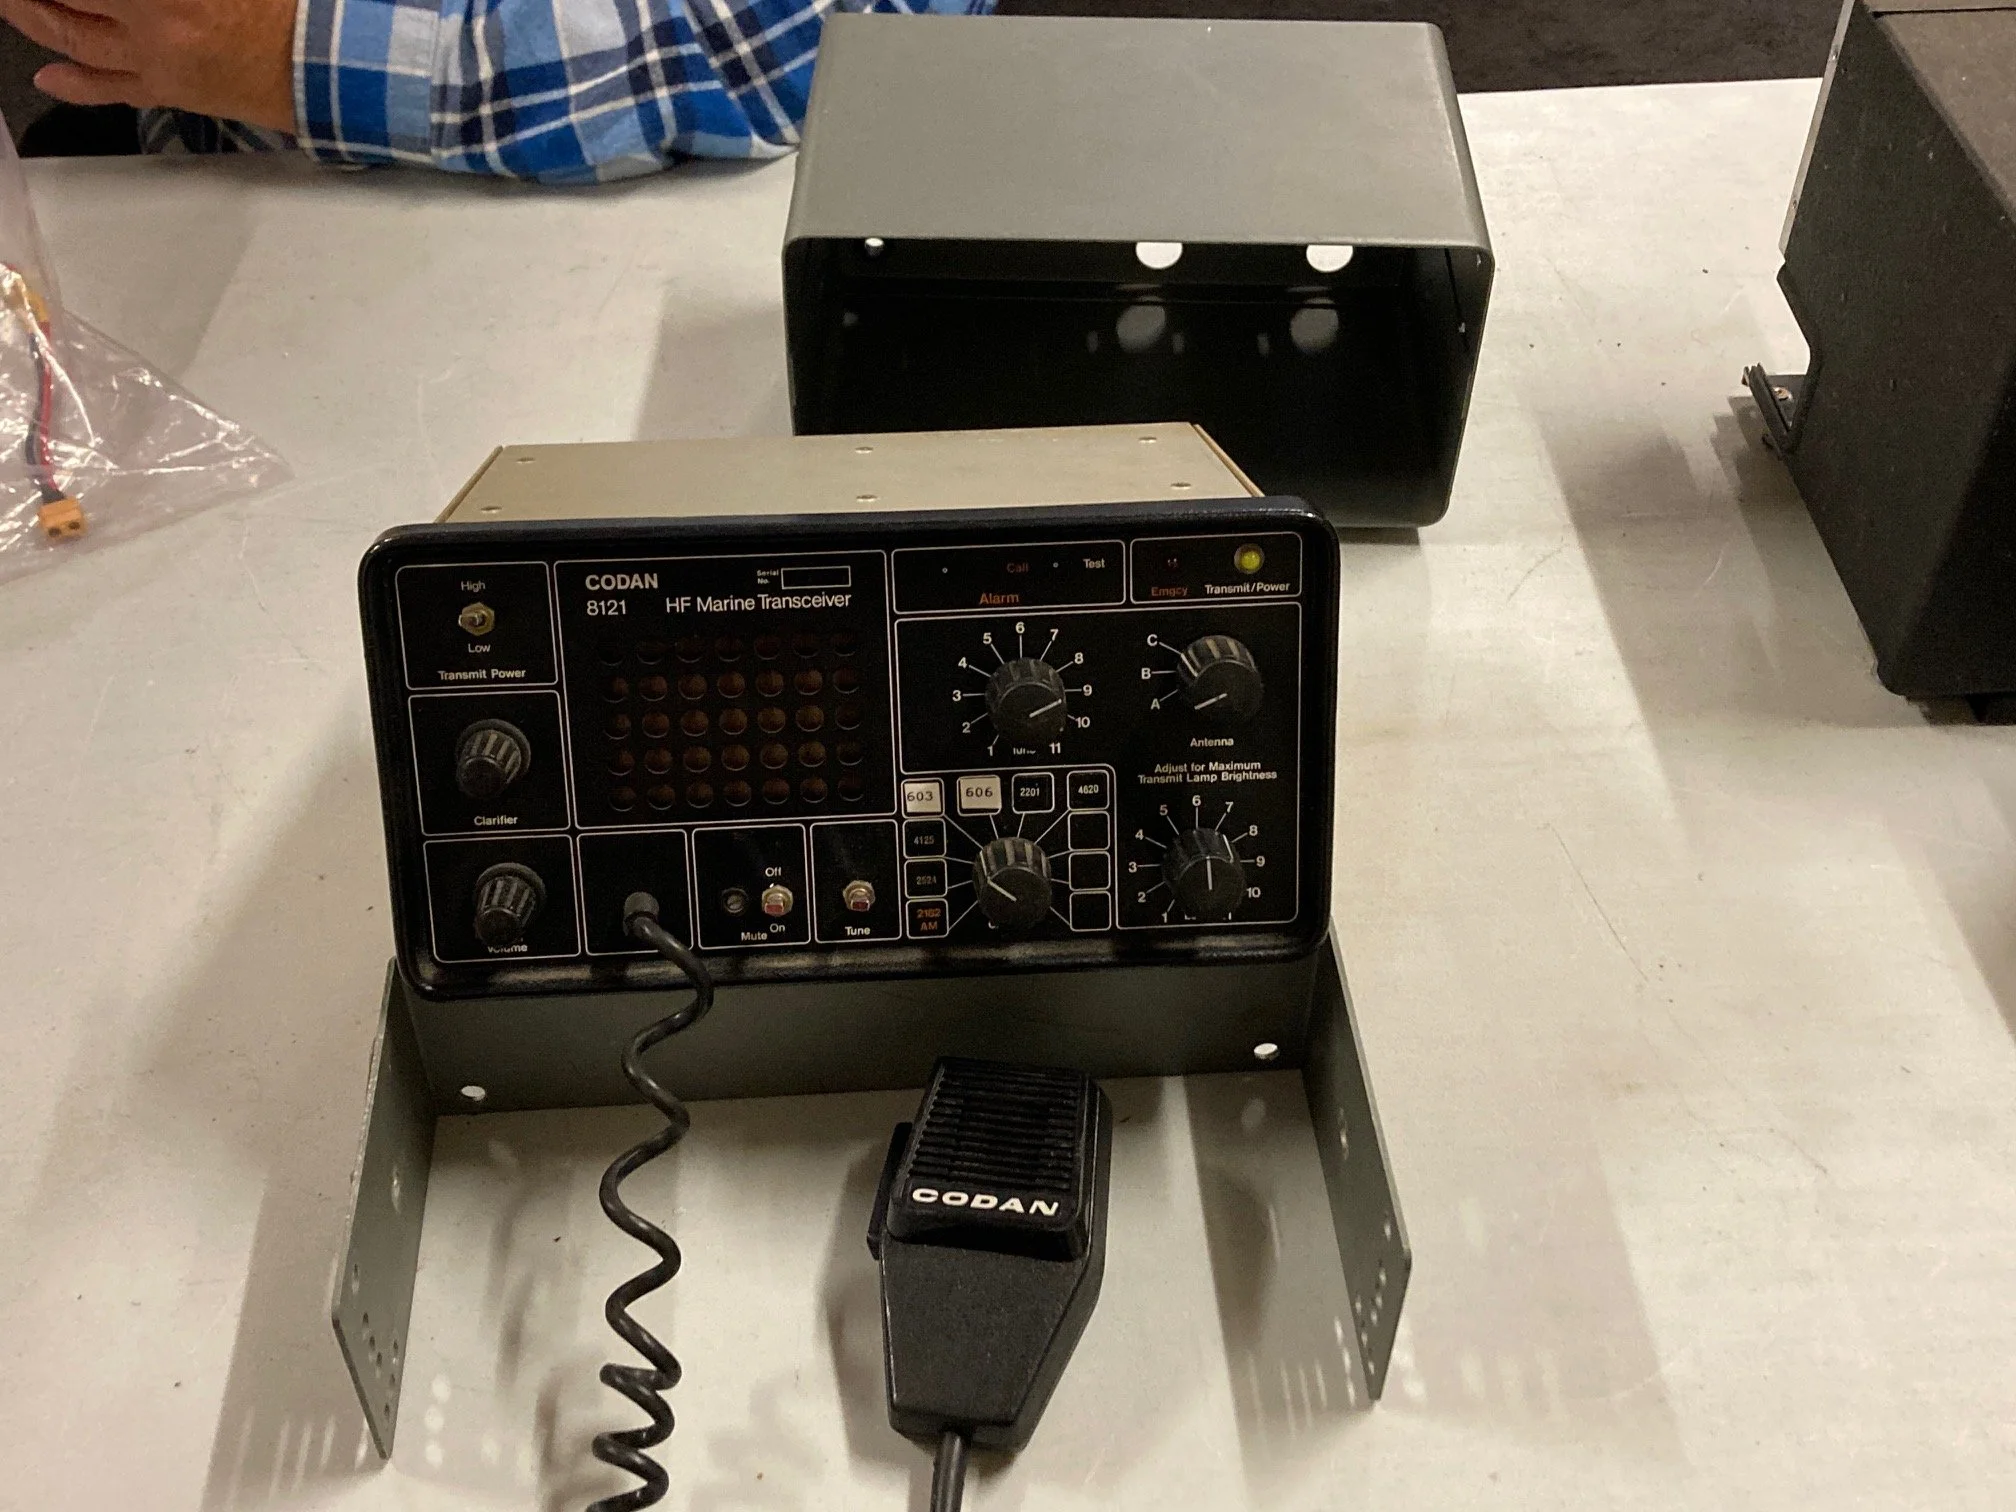
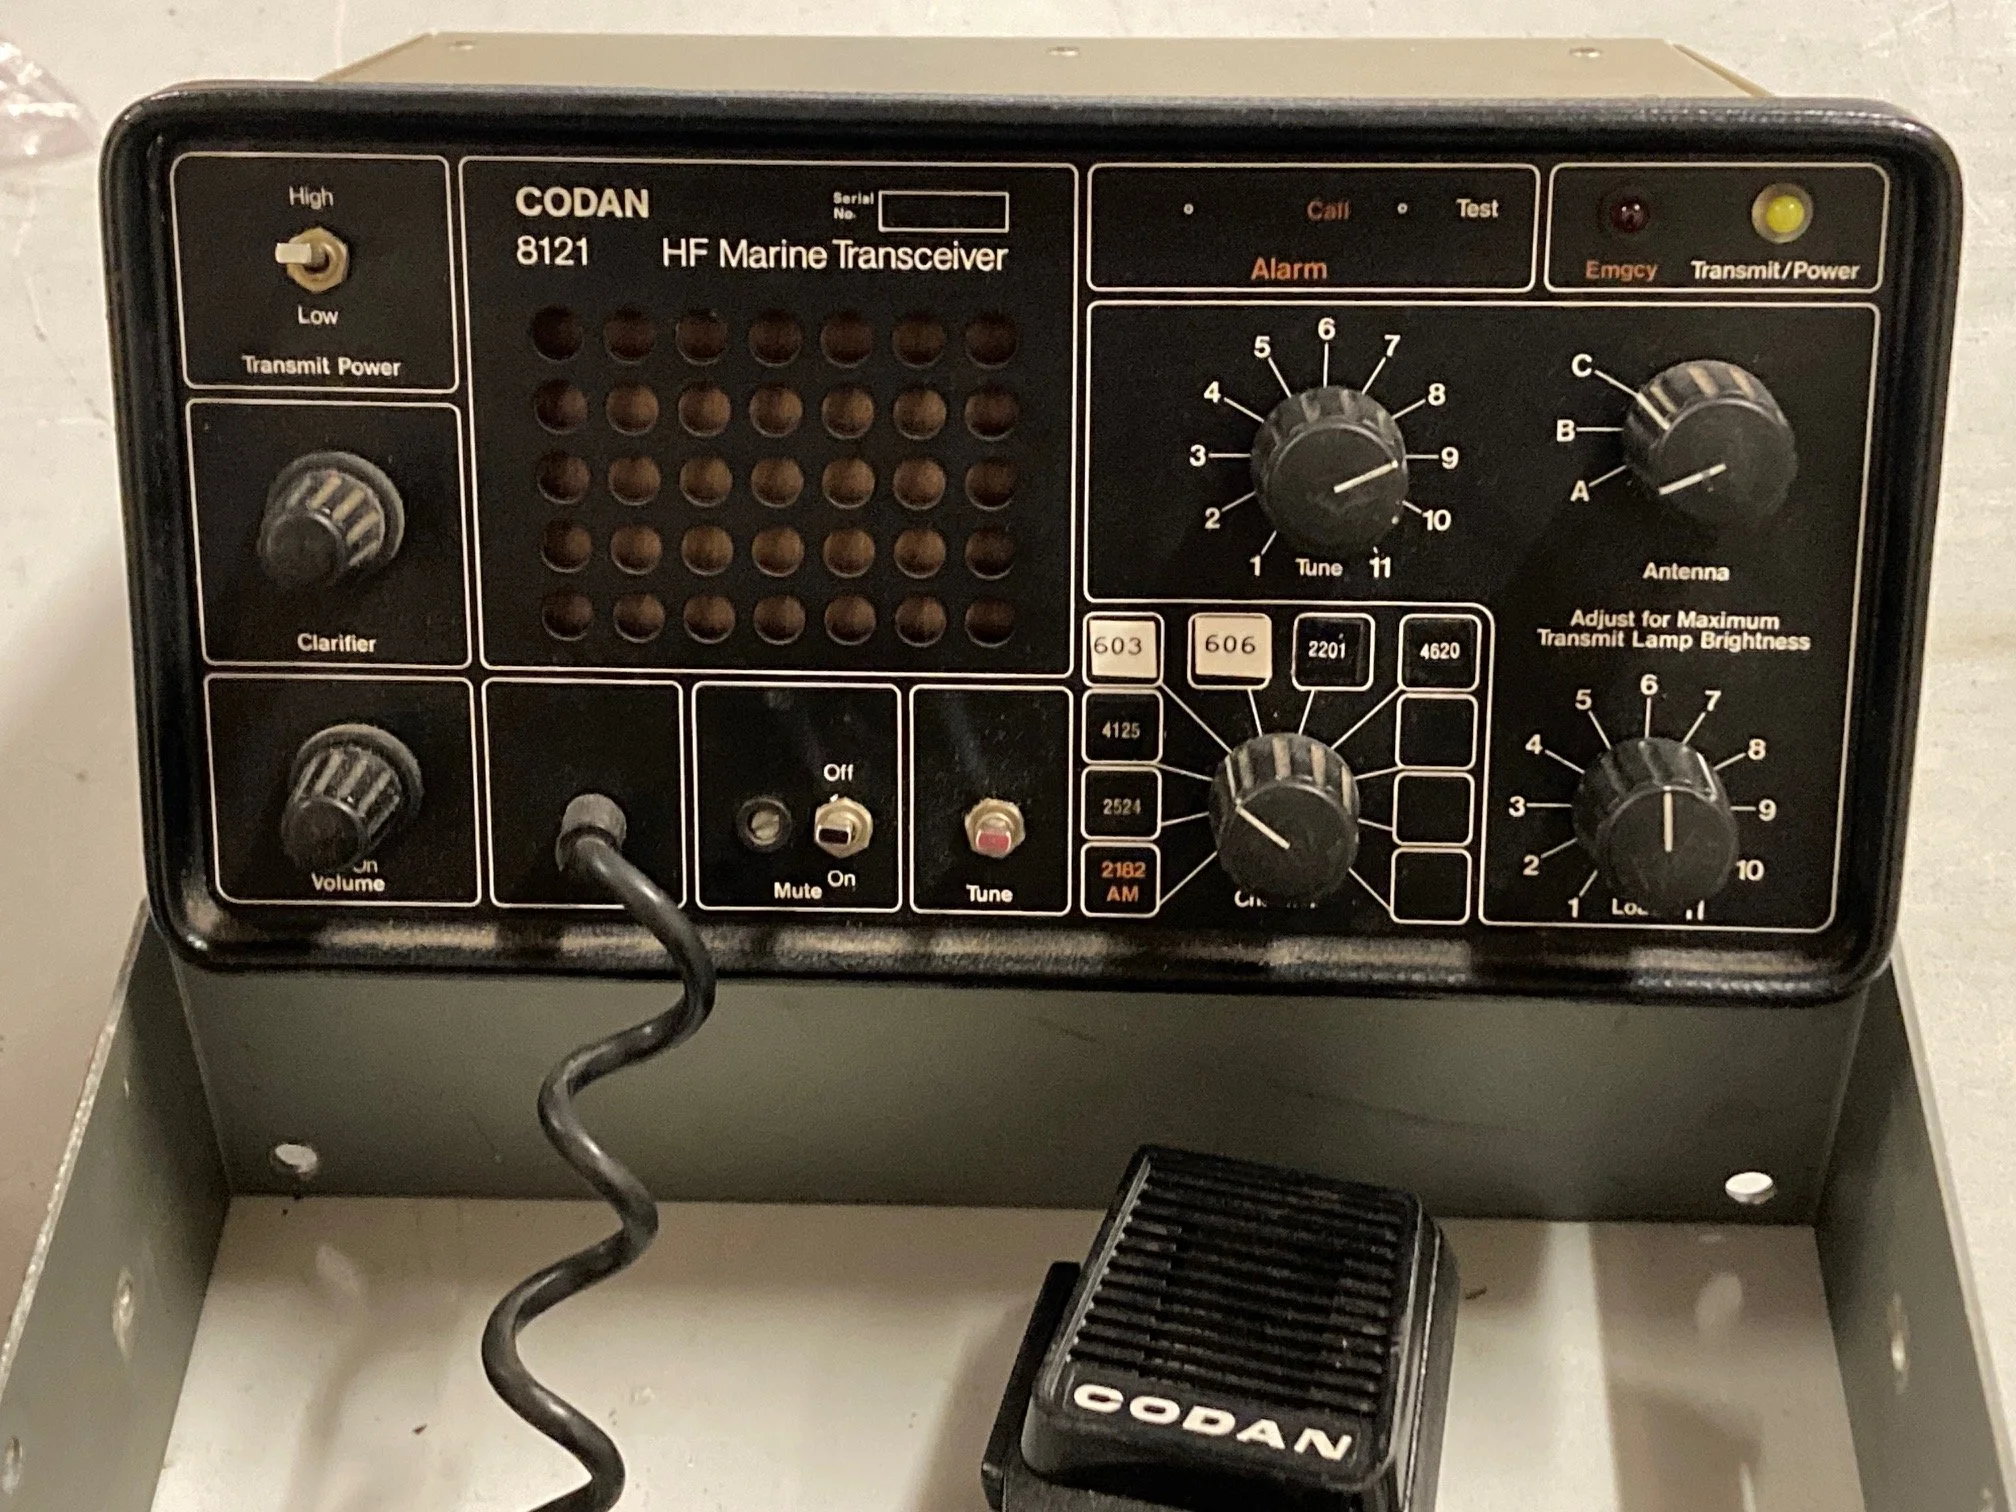
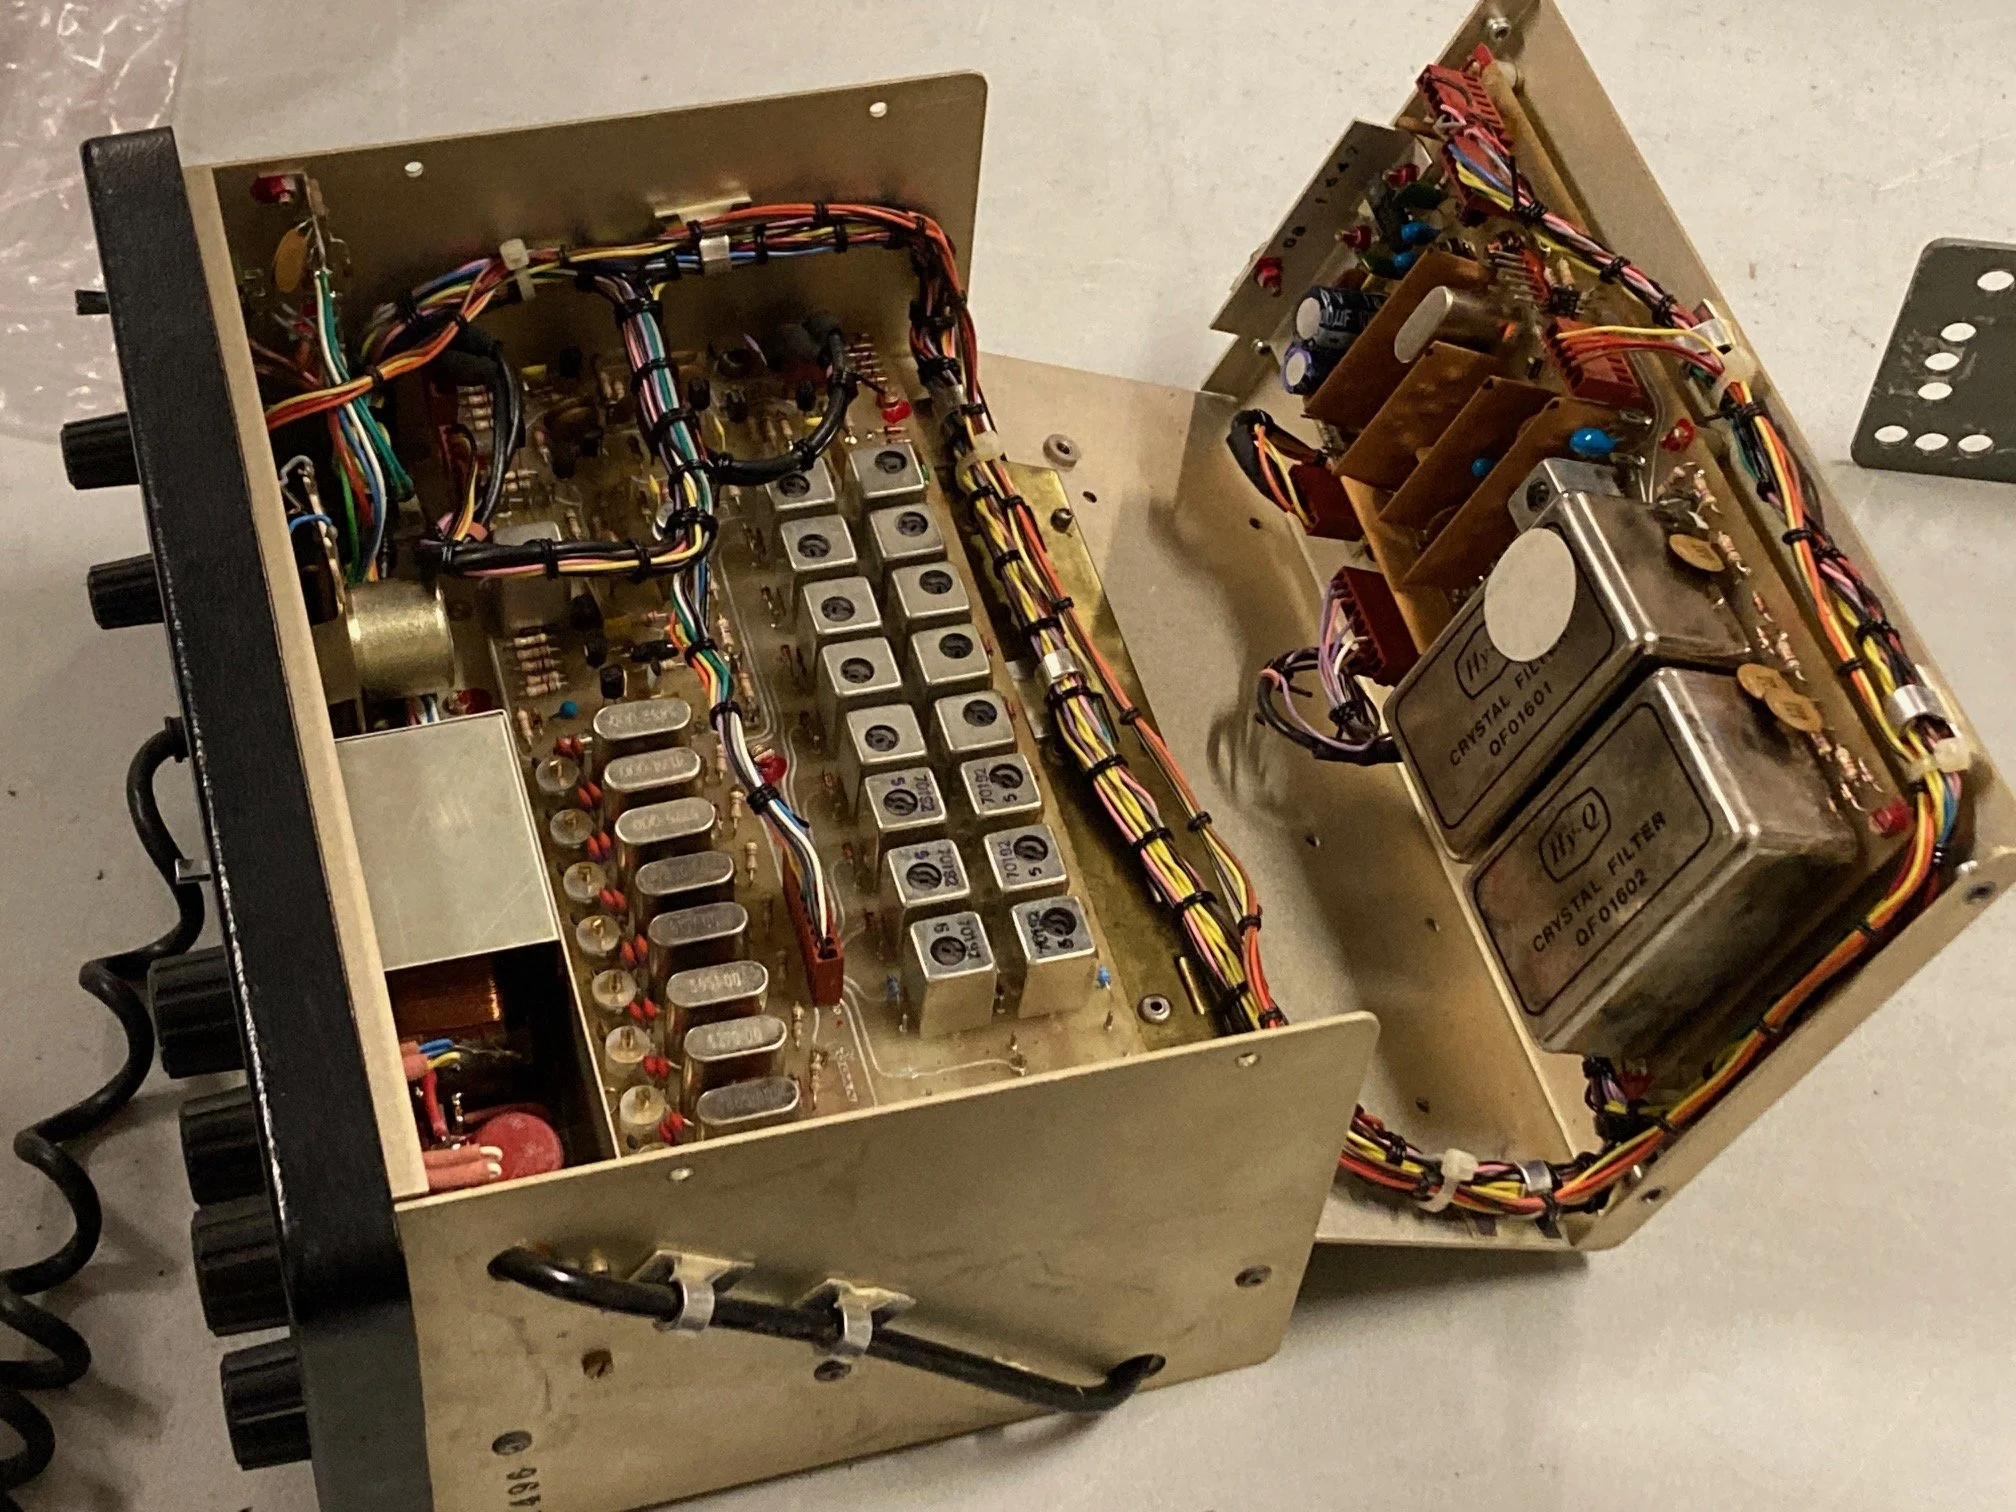
For a bit more of our Wednesday Technical Night last week, Ross VK7ALH brought in a Codan 8121 marine HF transceiver for show and tell. Designed for operation from 2 to 13 MHz, the unit supports up to ten fixed frequencies, each assigned to one of the ten front panel rotary selectable channels. The operating frequencies are set by installing the appropriate crystals into the internal socket bank.
The radio can run from either 12 or 24 volt DC supplies, with positive or negative grounding, helping to minimise electrolysis issues on vessels. Reliability was clearly a major design focus, with thick film construction, flow-soldered boards, and fully laced internal wiring looms. Seeing that beautiful cable lacing again, certainly brought back some strong memories of the old days, hi-hi.
Transmit power is rated at 15 Watts average on AM and 60 Watts PEP on SSB. Physically, the unit measures 280 mm wide × 140 mm high × 212 mm deep and weighs just over 3.5 kg. The case is finished in a matte silver-ish grey, while the front panel is matte black with clear white lettering. The all alloy, corrosion resistant construction certainly reflects its marine heritage.
The front panel layout is simple and uncluttered, with well-spaced controls. An inbuilt antenna-matching section makes tuning straightforward... according to the front panel instructions all the operator has to is “Adjust for Maximum Transmit Lamp Brightness”, can’t get much simpler than that. The microphone is captive or no connector, a deliberate choice to avoid problems with plugs and sockets in harsh marine environments. Codan even included a forward facing speaker for improved audio clarity. These sets were widely used throughout Australia and New Zealand from the 1970s onward.
This particular example was in immaculate condition, both inside and out, leading one to wonder whether it ever actually went to sea.
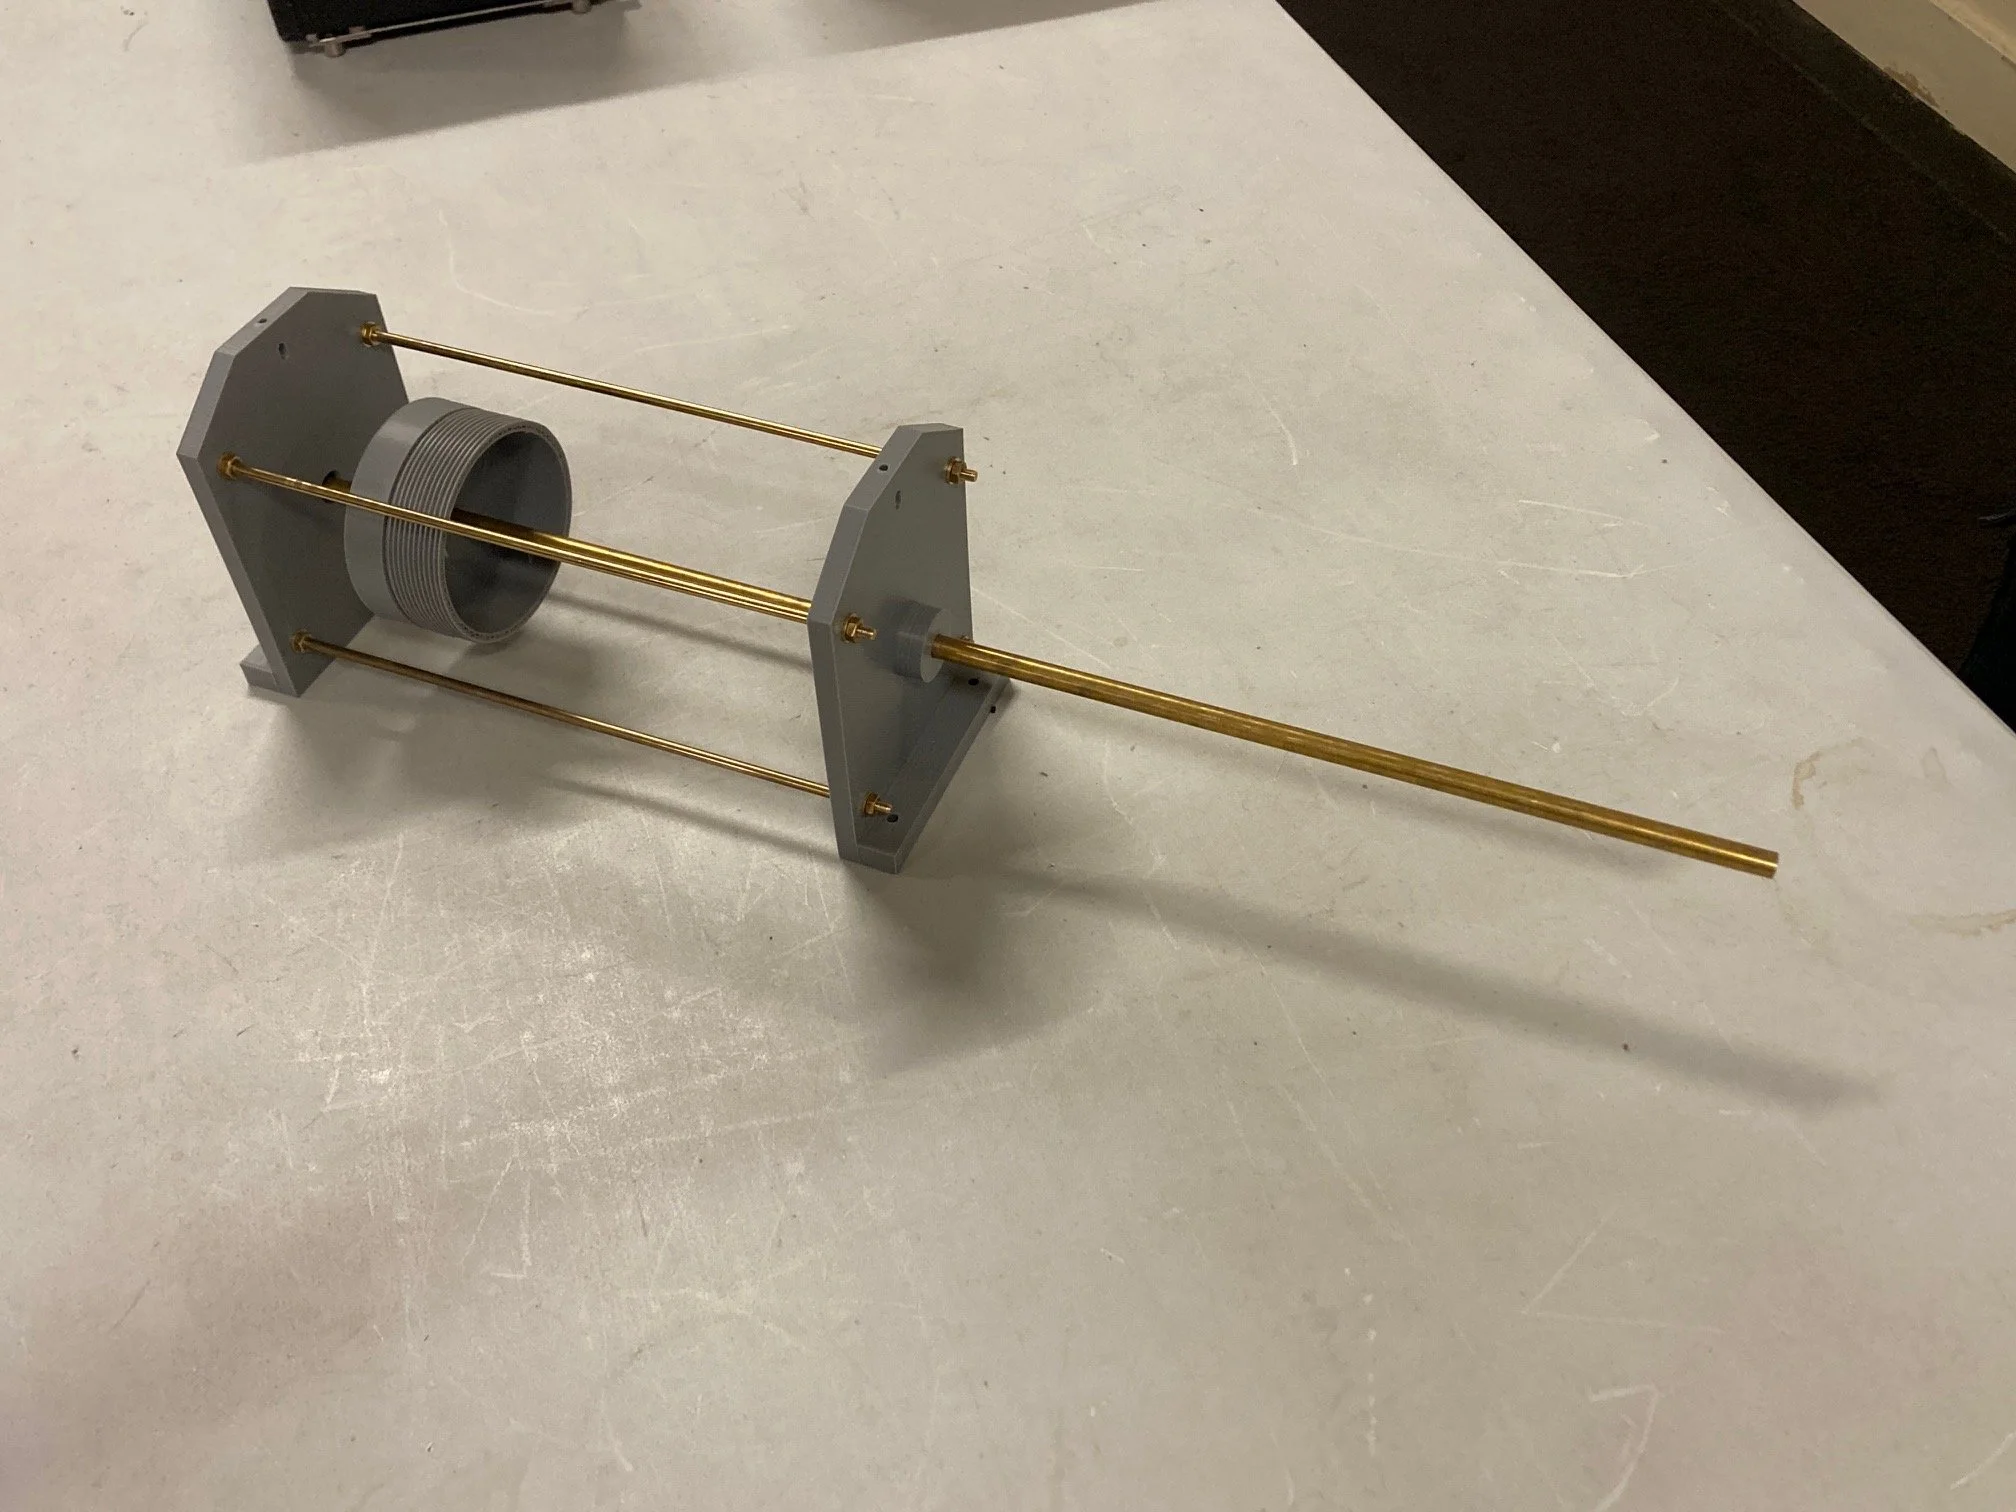
Colin VK7ZCF has been busy with his 3D printer again, this time starting work on a rather substantial roller inductor. He’s printed both end cheeks, think sturdy bookends and you’ll be close. These are spaced apart by four long brass rods with tapped ends, bolted through the cheeks to hold the assembly together with impressive rigidity. Running axially through the centre is a much heavier brass axle, and mounted on that is a large 3D printed coil former, all ready to take wire. Not bad for a prototype. It’s definitely taking shape, and we’re all looking forward to seeing the next iteration, hopefully at the next tech night.
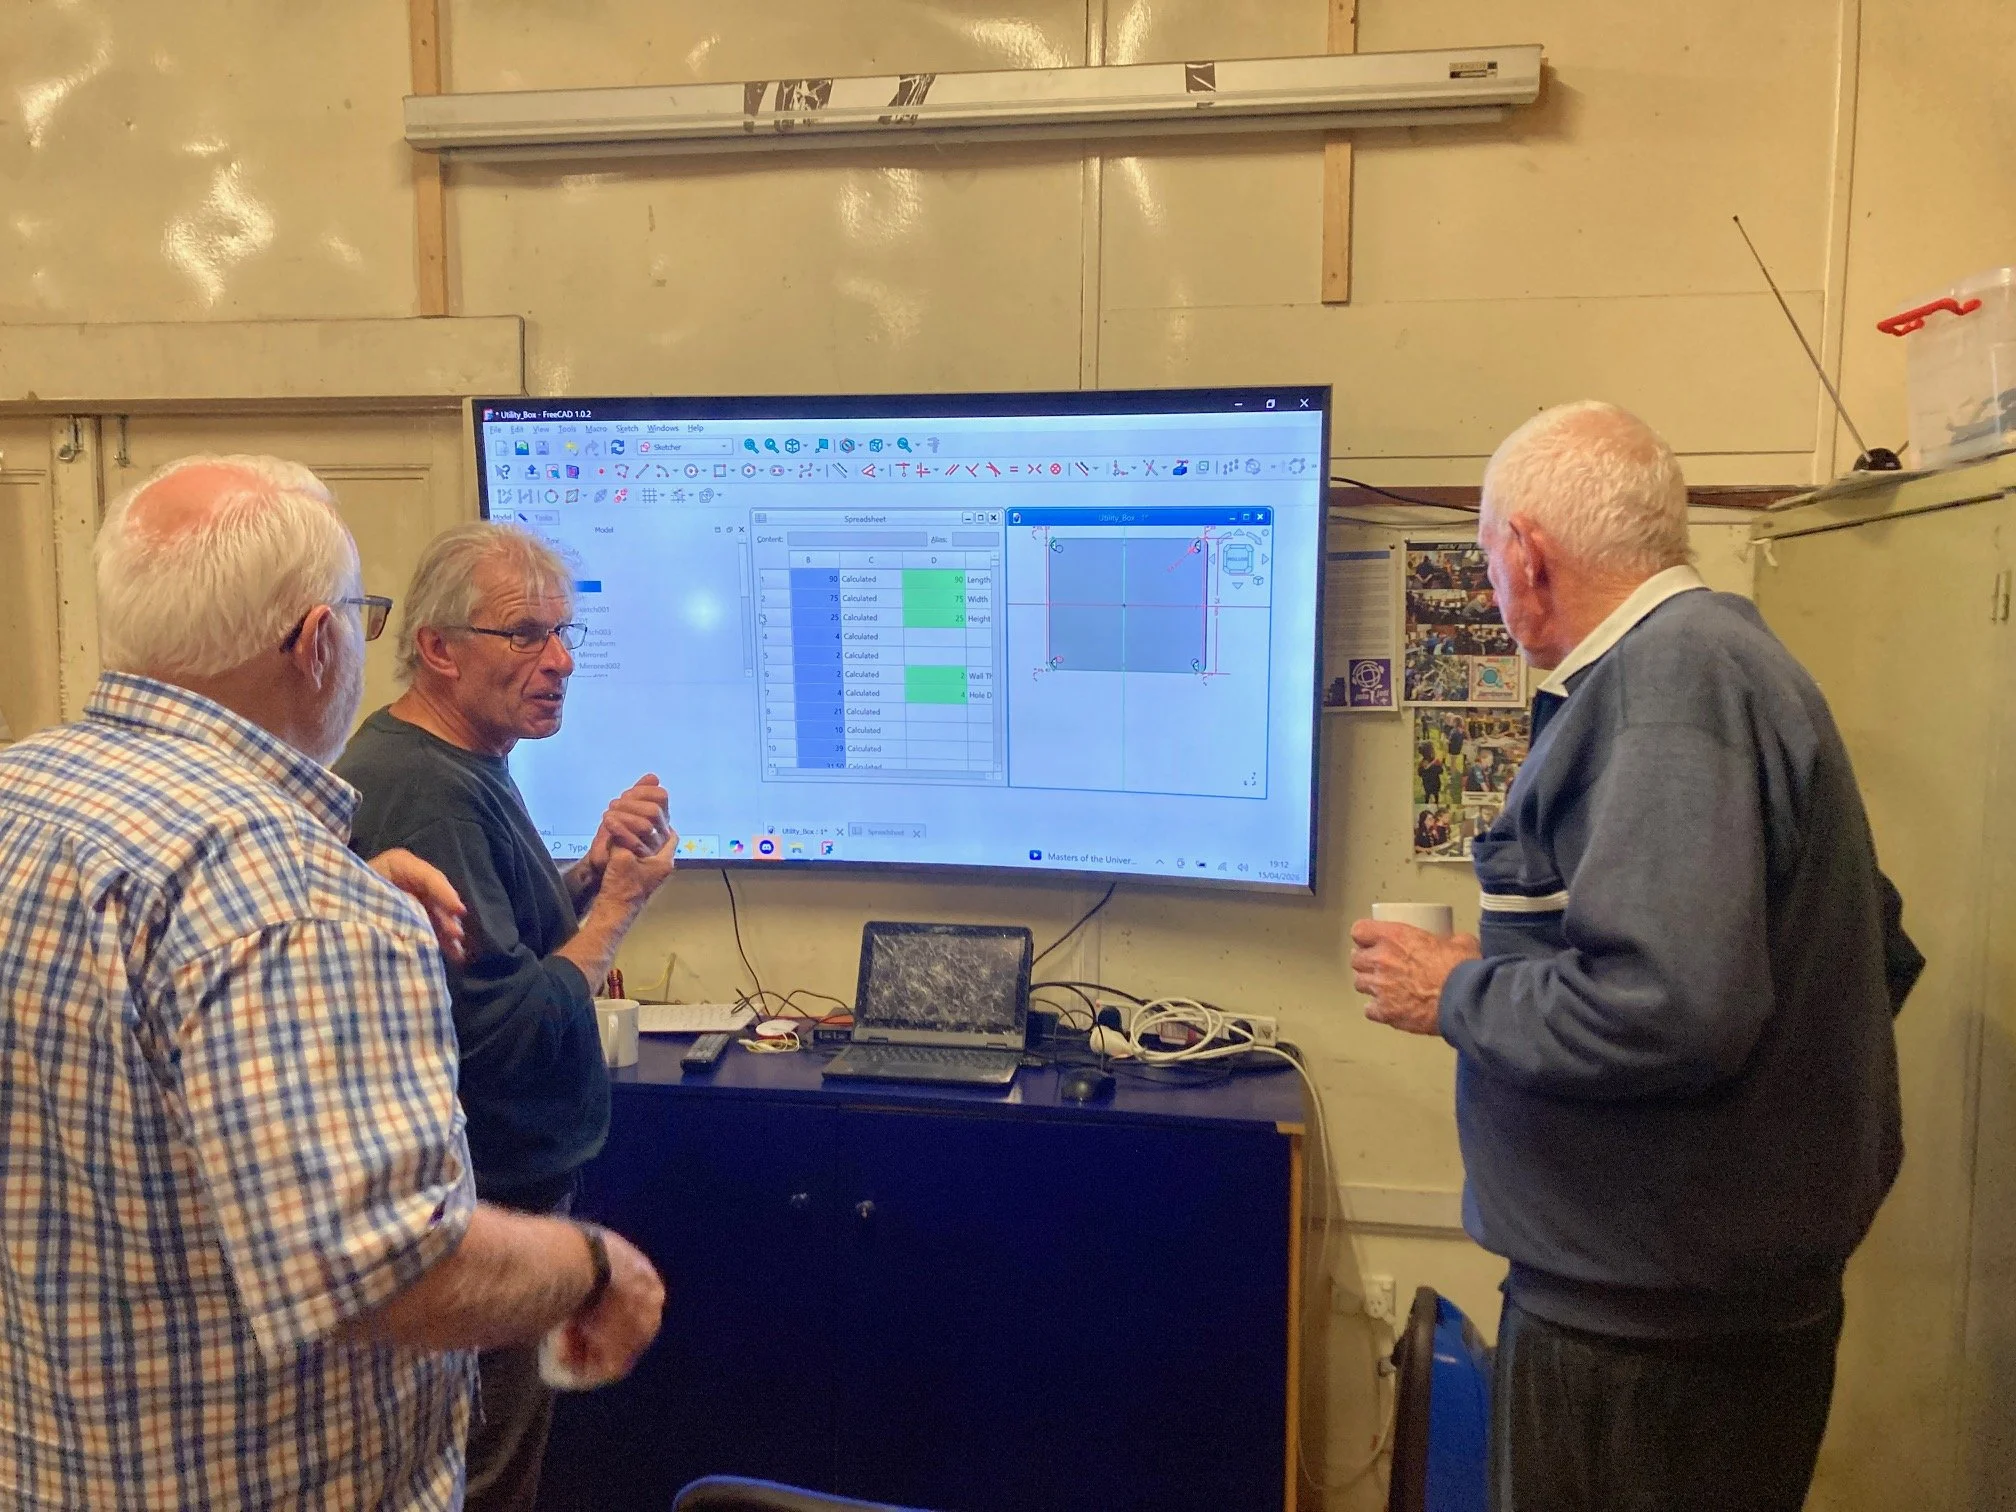
While we were still on the subject of 3D printing, Stuart VK7ES shared some of his recent experiments with the latest release of FreeCAD, version 1.1. Interestingly, some of the drawings he’d created in the new version threw errors when opened in our club’s older 1.0 installation. That was all the excuse we needed to install the latest version on the club’s workhorse computer, and before long we were exploring several of Stuart’s designs in the updated environment.
FreeCAD certainly presents a steep learning curve, so if you’re starting from scratch, as Stuart was, you may as well dive straight into the latest version. Stuart then walked us through some of the newer features and how he’d configured the workbenches and tools to suit his workflow.
One example he showed was a generic enclosure with a detachable bolt-on lid. The enclosure itself was nothing unusual, but the clever part was his use of FreeCAD’s built-in spreadsheet. Stuart had pre-loaded the spreadsheet with all the formulas that drove this modelling, now simply enter the desired side lengths into the relevant cells, and the enclosure updates automatically.
The formulas calculate all the new proportional dimensions, fillets, support-pillar shapes and sizes, strengthening ribs, radii and wall thickness. Doing all of that manually would require a fair bit of CAD editing, but with the spreadsheet implementing all the changes, you just type in the new dimensions and you are good to go!
Stuart’s next planned improvement is to add an interlocking raised and trenched lip around the opening to take a weather proof sealing ring for the lid. We’re looking forward to seeing that in the next iteration. Maybe even the sealing ring can be printed using some of the new soft filaments?
As usual pictures will be available on the NTARC Web site under “Blogs” for this broadcast. NTARC Blogs
UPCOMING EVENTS
On Air Test and Technical Net session - Every Wednesday night, Test-Net and CW course on 3.580 MHz from 7 pm, then a Technical Net on 3.567 MHz from 7.30 pm till 8.30 pm. Your host for the evening is Nic, VK7WW.
Club Room Technical night - The next session will be this Wednesday the 29th April and will commence at the usual time of 6.30 pm at the Club Room Archer Street, Rocherlea.
Coffee Morning - Held every Friday in the NTARC Club rooms. Time is from 10 am to noon.
Finally - If you have any items of news please email them to the Secretary at the following address news@ntarc.net all items to be received no later than 5 pm on the Friday prior to the Broadcast.
That’s all folks,
73, Stefan VK7ZSB.